To change the layout of your site, or to add Includelets, go to the Content Management tab, select the appropriate page in the Site Map, then click the Layout tab.
You can choose between a single large area for content, or a multi-column layout. The Layout tab also allows you to add Includelets. Each Includelet adds a piece of content to the page, in the column and order specified.
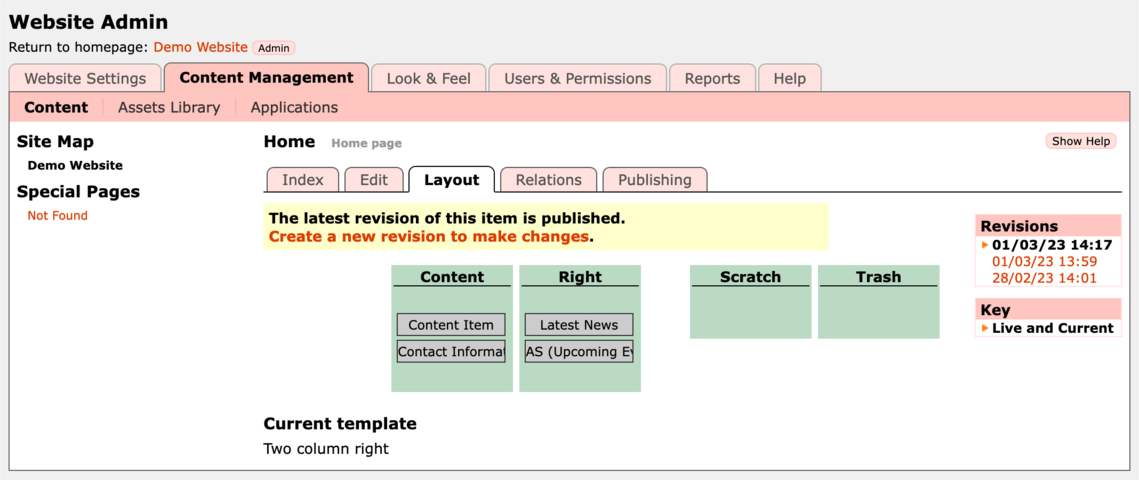
This picture shows the layout of a typical website homepage. The green areas are called Slots. The Slots contain Includelets.
This site is using a two column layout with a slot for each column. The Content slot controls what is shown in the main content column of the page, and the Right slot controls the content in a narrower column on the right of the page.
You can drag Includelets around to change their order, or to move them between different Slots.
The Scratch slot is where you can store includelets but they won't be visible on the page. To delete an includelet permanently drag it into the Trash slot.
In this example there are four Includelets on the page. They are:
- Content Item - this displays the WYSIWYG content for the current page. This is automatically added on all new pages.
If you delete this Includelet then you won't see your WYSIWYG's content on the published page! - Contact Information - this displays a location map and contact details as given when you applied for your website, and which can be changed in the Website Settings tab of the admin pages.
- Latest News - this shows the titles and subtitles of the most recent News Stories added to your website.
See the News Stories section of the Getting Started helpsheet for more information. - Upcoming Events - this shows the next few Events from the Events Calendar application.
Includelets don't show anything on the page if there is no appropriate content to show. e.g., the Upcoming Events includelet won't appear at all if there are no events. Likewise a column won't show on the page if there's no content in it. Therefore, in the above layout, the Right column will only appear if there are any News Stories or Upcoming Events to display. If there are neither then the main Content column will fill the page.
Note that you can't change the layout of the published revision of a page. In this case you will see a link, Create new revision to make changes, which will make a new revision which you can edit, preview, and publish.
Templates
All the themes work well with a standard single column layout, or you can get more adventurous by choosing to have more columns. You can select the layout individually for each page, or if you set it for the site's homepage it will be used for all pages of your site unless you specify otherwise.
The available layouts are:
One column - a single large content area.
Two column left - a second column is shown on the left side of the page. In some themes this left column will automatically enable itself if you select a left column menu.
Two column right - a second column is shown on the right of the page.
Three column - both left and right columns are visible as well as a wider central column.
Five area - as well as the three columns also makes available an area above and below these columns which you can use to place an includelet which fills the full page width.
Regardless of which layout you choose, if you leave an area empty then it will not be shown on the page. Thus you are safe to select Five area and then pick and choose on a per-page basis which columns have content. This is what I normally do!
Slots
These are the green areas in which Includelets are placed. You can drag Includelets between Slots, or within the same Slot to rearrange them. On the right are two special Slots: Scratch and Trash. These two slots are not shown on public pages. Scratch is available to for Includelets that you have configured and would like to store but not display. The Trash slot is used to permanently delete an Includelet from your page.
Column Stacking
The way the slots display on your site varies slightly from theme to theme. But in general, if you have content in all available slots, it will show on your site like this:
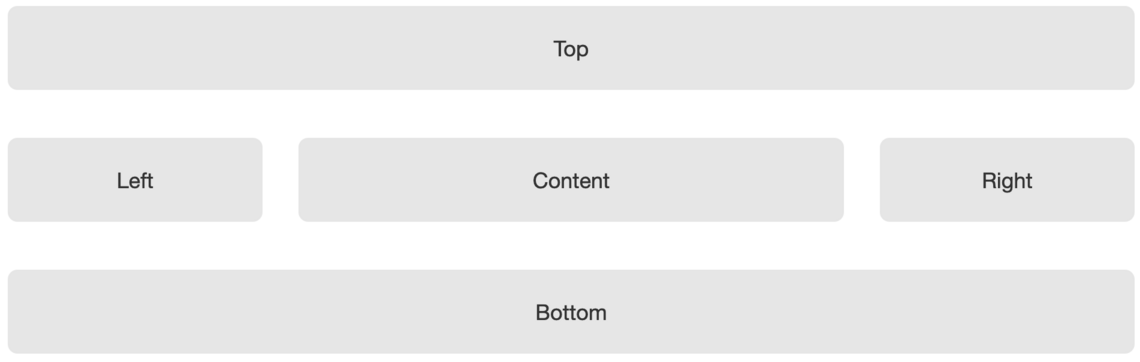
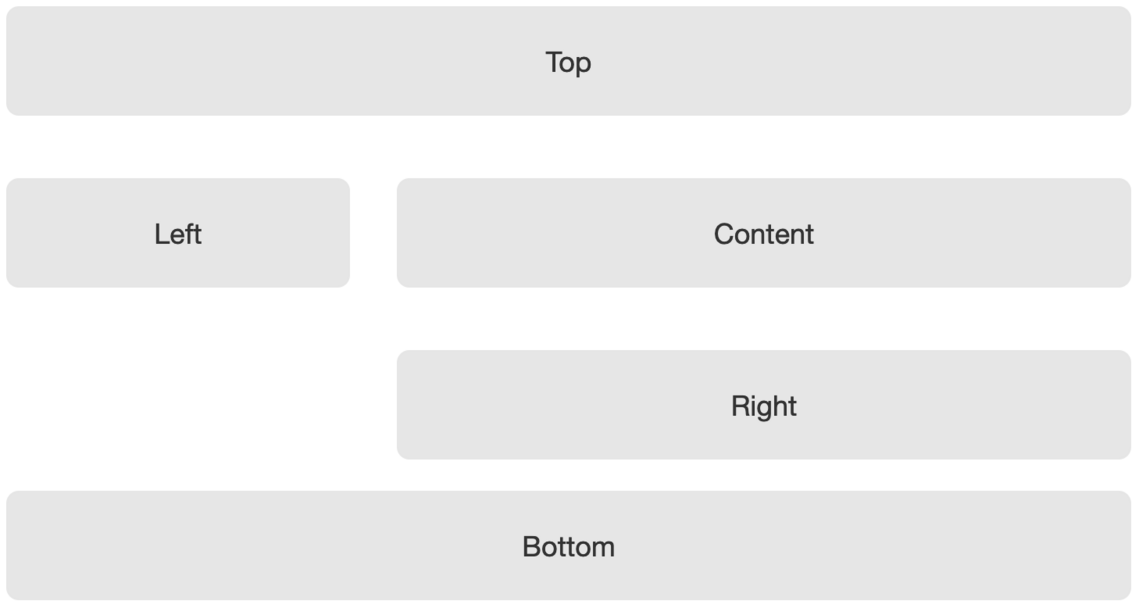
- The Top slot uses the full page width, and displays above all other content.
- The Left, Content, and Right slots display as columns. Content is always the widest.
- The Bottom slot will uses the full page width, and is always below the Left, Content, and Right slots.
Columns with no content do not display on the page.
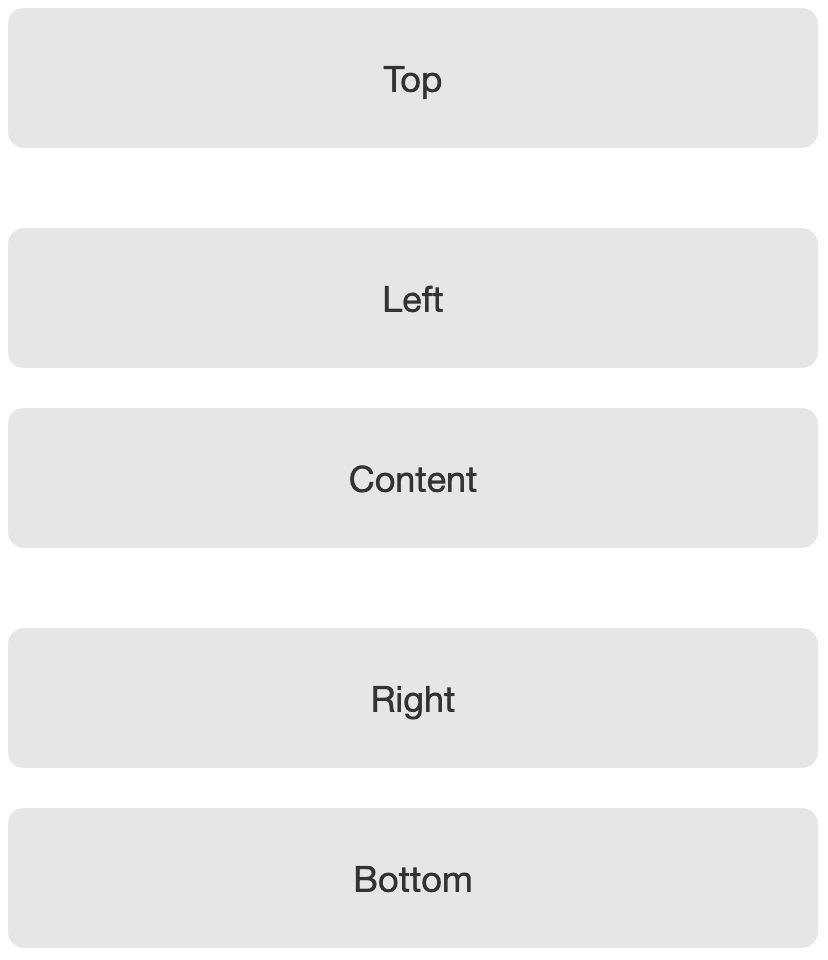
On narrow screens such as smartphones, where there isn't enough space to display columns next to each other, the slots stack up one on top of the other, in the order: Top, Left, Content, Right, Bottom. Like this:
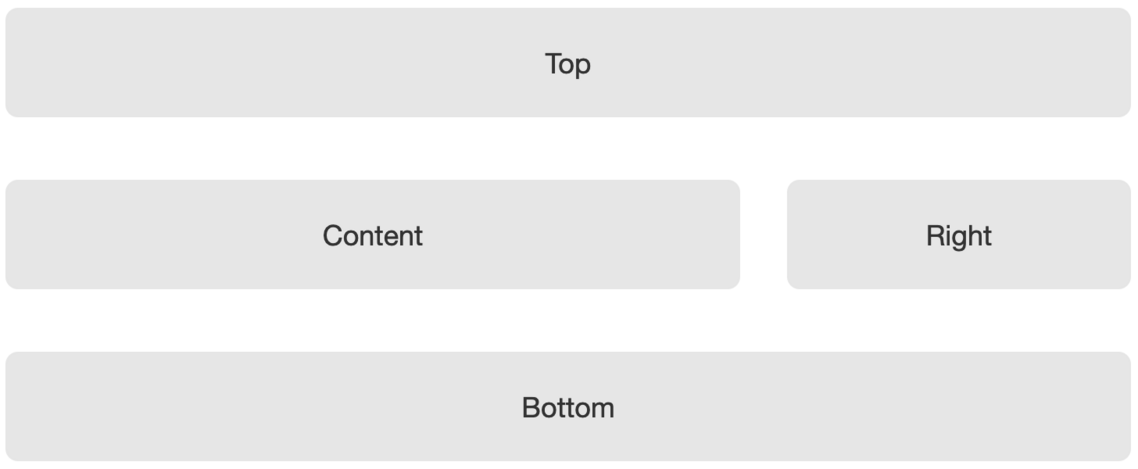
On a medium size screen, such as an iPad, there are two possible layouts depending on whether you have a Left slot, a Right slot, or Both. (There is always a Content slot!)
If there is only one of Right or Left present on the page, they will be shown next to the Content slot, like this:

If both Left and Right are present, then on the iPad size screen the Right will go under the Content, and the Left will be to the left of both of them: